
Recessed Lighting: What Homeowners Should Know Before Any Work Begins

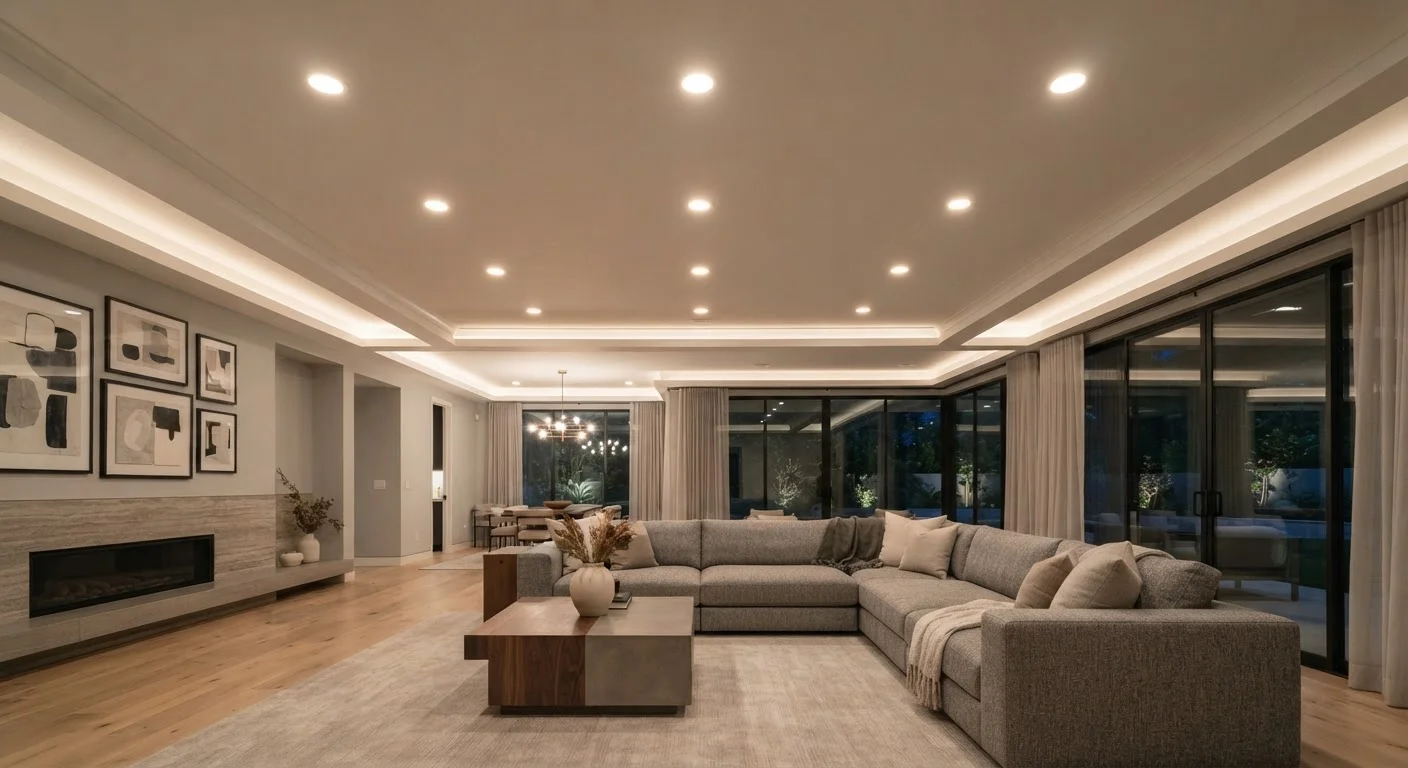
Photo: AdvisorBooth.net editorial
Key Takeaways
- Recessed lighting sits flush inside the ceiling, requiring careful housing selection based on ceiling construction.
- New construction and remodel housings serve different purposes - using the wrong type creates safety and code issues.
- Layout spacing and fixture count directly affect whether lighting feels balanced or uneven.
- Most recessed lighting projects involving new wiring require a permit and a licensed electrician.
- LED bulbs and compatible trim kits simplify energy use and let you control light quality.
What Recessed Lighting Actually Is
Recessed lighting - sometimes called can lights or downlights - consists of fixtures installed inside the ceiling so the light source sits flush with or slightly above the ceiling surface. Unlike pendant lights or ceiling fans, there is no visible body hanging into the room. The result is a clean, streamlined look that works across many room types.
Each fixture has three parts: a housing (the metal canister hidden above the ceiling), a trim (the visible ring and reflector you see from below), and a bulb or integrated LED module. Understanding how these parts work together - before you make any purchases - saves time, money, and frustration later.
Housing
The metal canister installed above the ceiling that holds the electrical components of a recessed light. It is not visible once the ceiling is finished.
Trim
The visible part of a recessed fixture - the ring, reflector, or baffle that sits flush with or just below the ceiling surface.
IC Rating
A safety classification indicating a fixture is safe for direct contact with insulation. Fixtures without this rating can overheat and pose a fire risk near insulation.
Remodel Housing
A fixture housing designed to be installed through an existing finished ceiling without needing access from above. Also called retrofit housing.
Color Temperature
A measure of the warmth or coolness of light, expressed in Kelvin (K). Lower numbers produce warm, amber light; higher numbers produce cooler, bluish-white light.
Airtight Housing
A housing type designed to minimize air leakage between the living space and the ceiling cavity, improving energy efficiency and often required by modern building codes.
Recessed lighting is a popular choice for kitchens, living rooms, hallways, and bathrooms. For bathroom-specific ideas, see our guide on small bathroom upgrades.
Choosing the Right Housing Type
The housing you choose must match your ceiling's construction. Getting this wrong creates both safety and code compliance problems.
- New construction housing attaches to joists before drywall goes up. If you are framing a room or have full attic access, this is the appropriate choice.
- Remodel housing (also called retrofit housing) clips into an existing finished ceiling from below. This is what most homeowners use when updating a finished room.
- IC-rated housing is required wherever the fixture will be in contact with or close to ceiling insulation. IC stands for insulation contact. Non-IC fixtures must maintain a minimum clearance from insulation - typically 3 inches - to prevent overheating.
- Airtight housing reduces energy loss through the ceiling and is often required by energy codes in conditioned spaces.
Non-IC Fixtures Near Insulation Are a Fire Risk
If your ceiling has an attic or insulated cavity above it, confirm the IC rating of any fixture before installation. This is not optional - it is a fire safety requirement.
Planning Your Layout
A thoughtful layout is what separates recessed lighting that looks professionally designed from a ceiling that feels randomly punched with holes.
Fixture size: Common diameters are 4-inch and 6-inch. Smaller fixtures produce more focused light; larger ones spread light more broadly. Most general living spaces work well with 6-inch fixtures.
Spacing: Divide your ceiling height in half as a starting-point guide to spacing between fixtures. An 8-foot ceiling suggests approximately 4 feet between lights. Fixtures placed too close together create hotspots; too far apart leaves dark zones.
Placement relative to walls: For general ambient light, position fixtures 2 to 3 feet from the wall. For wall washing - lighting artwork or an accent wall - place them closer, 12 to 18 inches out, and use a directional trim.
Sketch your room to scale before buying anything. Mark switch locations, ceiling joists (which affect where you can cut), and any obstructions like HVAC ducts above the ceiling plane. Renovations that involve structural changes deserve the same careful upfront thought - something our article on open-concept renovation realities covers in depth.
Trim Styles and Bulb Choices
Once you've selected a housing, you'll pick a trim - the part you actually see. Trims are often sold separately and can be swapped later, which gives you design flexibility.
- Baffle trim: Has ribbed inner walls that absorb excess light and reduce glare. The most common choice for living areas and bedrooms.
- Reflector trim: A smooth, reflective interior that maximizes brightness. Good for kitchens or task-heavy spaces.
- Eyeball or gimbal trim: Allows the bulb to pivot and direct light at a specific spot, like a painting or a reading chair.
- Shower trim: Sealed and rated for wet locations. Required in shower enclosures; do not substitute a standard trim.
For bulbs, LED options have become the practical standard. They produce less heat than older incandescent bulbs, last significantly longer, and are available in a range of color temperatures - from warm (around 2700K) to cool daylight (5000K). Warmer tones suit bedrooms and living rooms; cooler tones work well in kitchens and bathrooms.
Match Color Temperature Across a Room
When to Call a Licensed Electrician
This is the section that matters most for your safety and your home's value. Recessed lighting is attractive precisely because it looks simple - but the work above the ceiling is where complexity and risk live.
You generally need a licensed electrician when:
- You are adding a new circuit or extending an existing one
- Your electrical panel needs to be evaluated for capacity
- Work involves knob-and-tube or aluminum wiring (common in older homes)
- Local code requires a permit for the scope of work
- You are unfamiliar with safely working around live wiring
Permits exist to protect you. A permitted job is inspected, which means a professional verifies the work is safe before your walls close up. Unpermitted electrical work can complicate home sales and insurance claims - a cost category that often surprises new owners. Our article on hidden costs of homeownership outlines how these downstream expenses add up.
Even if you plan to handle some prep work yourself - like mapping the layout or patching drywall afterward - bring a licensed electrician in for the wiring. It is one of the clearest cases where professional involvement protects both your home and your family.
Frequently Asked Questions
The content on this site is for informational purposes only and is not a substitute for professional advice. Always consult a qualified professional for guidance specific to your situation.